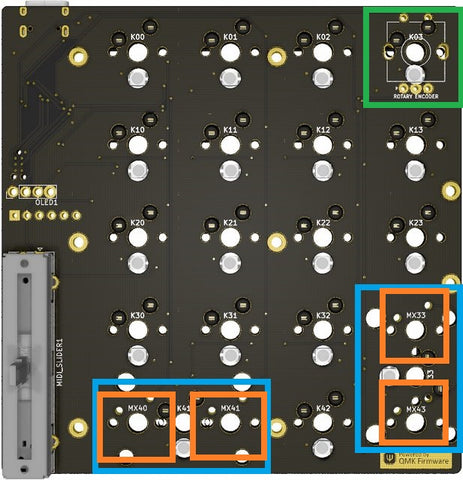
Assembly Instructions Congrats on picking up a 1UP Keyboards Acrylic Launch Pad! Before starting the build, ensure to flash your Launch Pad with the latest firmware. For advanced users looking to build their own firmware with custom oled screens, reference the QMK Wiki. Firmware: Releases Flashing Tool: QMK toolbox Key Configurator: VIA Configurator Final notes before assembly: For a numpad layout, ensure to install the stabilizers on the pcb (K41 and K33 depicted in blue). For a 5x4 layout, ensure to solder the 4 through-hole switches (MX40,MX41, MX33, MX43 depicted in orange) If using the rotary encoder, ensure to install the encoder to the pcb and solder the 5 pins (k03 depicted in green).